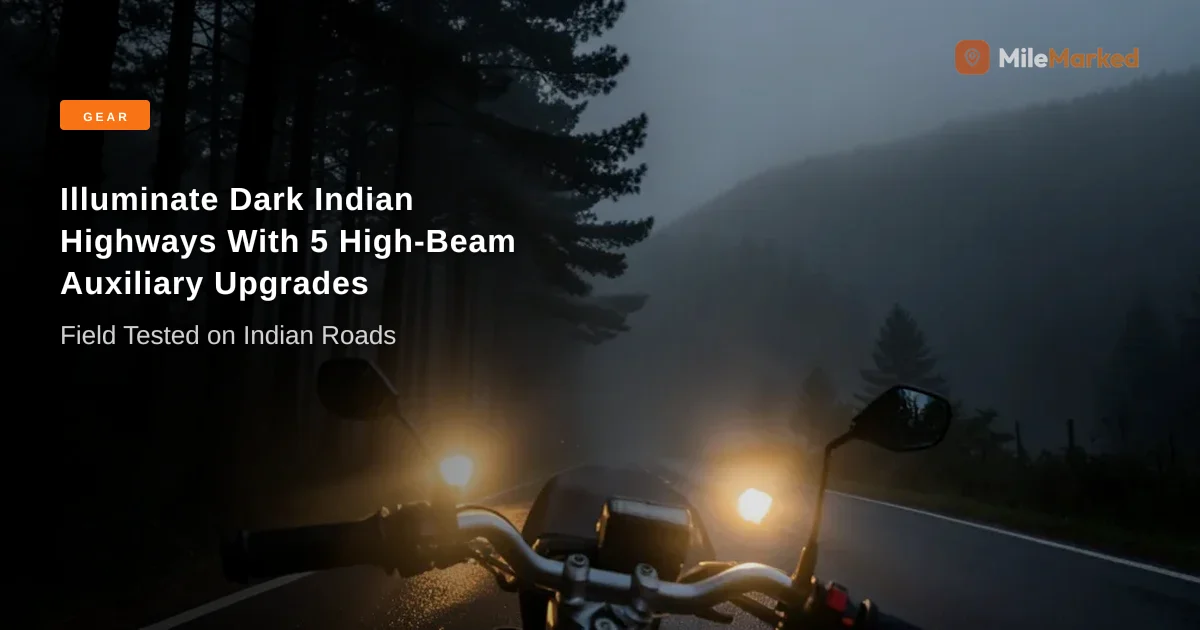
Riding Indian national highways after 9 PM with stock 55W halogen headlights is equivalent to riding blindfolded at 80 km/h. According to the Ministry of Road Transport & Highways (MoRTH) 2025 report, over 44% of all road fatalities in India involve two-wheelers, heavily concentrated between dusk and dawn on unlit roads. If you have ever hit an unannounced speed breaker at 70 km/h near Satara or slammed your brakes for stray cattle on the NH44, you already know that factory headlights are dangerously inadequate. Choosing the right auxiliary lighting setup isn't about looking cool outside a roadside dhaba—it is a fundamental survival gear decision.
This comprehensive motorcycle auxiliary lights india guide breaks down beam patterns, electrical wiring mechanics, color wavelengths, and exact Central Motor Vehicles Rules (CMVR) compliance guidelines to keep your rides bright and legal.
Quick Summary:
- Stock vs. Aux: Factory halogen headlights produce 700–1,200 lumens, whereas modern dual-tone LED auxiliary pods deliver 3,000–6,000 lumens, expanding your stopping reaction window by over 300%.
- CMVR Legal Limits: Legally, you can mount a maximum of 4 forward-facing lights. Auxiliary units must be mounted below the primary OEM headlight line and wired to independent switches.
- Traffic Fines: Driving with illegal colored lenses or unmasked high-beams within city limits incurs fines ranging from ₹500 to ₹1,500 under DMVR 97(2)/177 MVA and Section 112(4)(C)/177 MVA.
- Monsoon Visibility: Yellow light (3000K) cuts through heavy rain and mountain fog due to longer wavelengths that reduce backscatter, while white light (6000K) excels on dry highway asphalt.
- Electrical Limits: Always install a four-pin 40A relay harness with an inline fuse to protect your bike's ECU and stator coil—never tap directly into stock wiring looms.
Verified by MileMarked · Last verified: October 2026
Why Stock Motorcycle Headlights Fail on Indian Highways at Night
To understand why motorcycle auxiliary lights India setups have transitioned from optional touring luxuries to non-negotiable safety modifications, you must look at technical illumination output vs. real-world highway dynamics.
Standard factory headlights on popular touring motorcycles—such as older Royal Enfield Bullets or entry-level commuter bikes—rely on 35W/55W halogen H4 bulbs. These output a modest 700 to 1,200 lumens. Even modern bikes equipped with factory LED reflectors (like the KTM Duke 200 or Honda H'ness CB350) rarely exceed 2,500 to 3,200 lumens. On a dark four-lane national highway without streetlights, a stock 1,200-lumen headlight provides effective beam throw of roughly 35 to 45 metres.
At 80 km/h, your motorcycle covers 22.2 metres per second. Factoring in a human reaction time of 1.5 seconds plus braking distance on asphalt, your total stopping distance is approximately 55 to 60 metres. This creates a critical safety gap: you are outriding your headlight. By the time your factory beam illuminates an unlit parked truck, a stray cow, or missing tarmac, you have zero margin to stop safely.
+-------------------------------------------------------------------------------+
| Headlight Type          | Lumens Output   | Effective Throw | Reaction Window |
+-------------------------+-----------------+-----------------+-----------------+
| Stock Halogen (H4)      | 700 - 1,200 lm  | 35 - 45 metres  | Under-braked    |
| Stock Factory LED       | 2,000 - 3,200 lm| 50 - 65 metres  | Marginal        |
| Dual Aux Pods (60W)     | 5,000 - 7,000 lm| 120 - 180 metres| Safe Margin     |
+-------------------------+-----------------+-----------------+-----------------+
Upgrading to high-output auxiliary lighting pods boosts your total illumination to 3,000–6,000+ lumens, throwing usable light 120 to 200 metres down the road. This gives you over 6 full seconds of reaction time at highway speeds—the exact margin needed to stay alive on unpredictable Indian roads.
📋 Complete Mumbai to Goa Night Ride Planning Kit on MileMarked This route has a verified day-by-day itinerary, mapped fuel stops, hotel suggestions for every night, break points, and a downloadable packing checklist. Visit the Mumbai to Goa Night Ride trip page on MileMarked to download the complete planning kit — it's everything you need before you leave home.
Fog Lights vs Driving Spotlights vs Passing Lights: Which Do You Need?
A common mistake intermediate riders make is purchasing high-wattage lights without understanding beam geometry. Floodlights on high-speed highways will blind oncoming drivers while failing to project far enough ahead, while hyper-focused spotlights inside foggy mountain passes will bounce straight back into your eyes.
When evaluating fog lights vs led aux lights bike configurations, select your beam patterns based on the terrain you routinely navigate:
- Fog Lights (Wide Flood / Cut-off Beam): Engineered with a flat horizontal cut-off line and wide spread (60° to 90°). They illuminate the immediate road shoulders, ditches, and white lane markings without spraying light vertically into fog or rain.
- Driving Spotlights (Focused Pencil Beam): Designed with a narrow beam angle (10° to 25°) that concentrates photons into a tight beam. These project hundreds of metres down straight, unlit highway corridors like the Samruddhi Mahamarg or NH44.
- Hybrid / Combo Beams: Utilize dual reflectors or lenses inside a single pod—combining top-row spot optics with bottom-row wide flood optics.
- Passing Lights: Medium-spread wide beams mounted at mid-height, primarily calibrated to enhance motorcycle silhouette profile recognition in dense urban traffic.
Beam Type Comparison Guide
| Feature | Fog Lights | Driving Spotlights | Hybrid Combo Pods |
|---|---|---|---|
| Beam Angle | 60° – 90° Horizontal | 10° – 20° Narrow | 30° Spread + 10° Core |
| Effective Range | 30 – 50 metres | 150 – 250 metres | 100 – 150 metres |
| Best Use Case | Monsoon rain, mountain fog, off-road trails | High-speed national highways | All-round long-distance touring |
| Ideal Placement | Crash guard / lower engine bars | Below headlight / fork mount | Crash guard upper arm |
| Oncoming Glare | Very Low (if cut-off is calibrated) | Extremely High (requires dip switch) | Moderate |
In my personal experience riding across 40,000 km of Indian highways, a single-beam spotlight setup is a liability during monsoon tours. A hybrid pod or a dual-channel fog/spot combination gives you the versatility required for Indian riding conditions.
Yellow vs White Beam: Choosing the Right Wavelength for Indian Weather
The debate surrounding yellow vs white auxiliary light for monsoon riding comes down to optical physics: light scattering and color temperature measured in Kelvin (K).
3000K (Yellow)                  5000K (Warm White)             6500K (Cool White)
|<--- Long Wavelength -------- Mid Wavelength ---------------- Short Wavelength --->|
 (High Fog Penetration)         (Balanced Asphalt Contrast)     (High Sign Reflectivity)
The Physics of Yellow Light (3000K)
Visible light ranges from violet (~380 nm) to red (~750 nm). Cool white LEDs operate between 6000K and 6500K, emitting high concentrations of blue light at shorter wavelengths. When blue light hits suspended water droplets in rain, mist, or Himalayan fog, Rayleigh scattering causes the light to reflect directly back toward your eyes, creating a blinding wall of white glare.
Yellow light operates at a lower color temperature (2700K to 3000K) with longer wavelengths. It cuts through water vapor, mist, and dust with significantly less backscatter, allowing your eyes to track pavement lines and potholes in heavy monsoon downpours or early morning mountain passes.
The Power of White Light (5000K - 6000K)
On clear, dry asphalt, white light reigns supreme. Crisp 5500K–6000K illumination provides superior color rendering and high contrast against dark road surfaces, making unlit speed bumps, road debris, and reflective highway signage stand out clearly.
The Ideal Indian Setup
I strongly recommend avoiding single-color 6500K white lights if you tour year-round. Instead, choose dual-tone switchable LED pods (such as the Future Eyes F150 or MadDog Alpha series) or keep removable yellow polycarbonate caps stored in your tank bag. Running low-beam yellow (3000K) for foggy or wet conditions and switching to high-beam white (5700K) for dry highway stretches offers the ideal configuration for Indian roads.
Are Auxiliary Lights Legal in India? CMVR Rules & Fine Breakdown
Understanding motorcycle spotlights legal rules CMVR enforcement is critical to avoid expensive challans and vehicle impoundment during interstate transit. Traffic police in states like Kerala, Karnataka, Maharashtra, and Delhi actively target aftermarket lighting setups.
Central Motor Vehicles Rules (CMVR) Framework
Under Rule 105 and Rule 106 of the Central Motor Vehicles Rules (1989) and updated MoRTH notifications:
- Maximum Light Count: A two-wheeler cannot operate more than four forward-facing light sources simultaneously (including the OEM primary headlight).
- Mounting Height Limits: Auxiliary lights must be mounted below the level of the main headlamp. Mounting lights on top of handlebars, mirrors, or helmet mounts is illegal.
- Color Restrictions: Forward-facing auxiliary lights must strictly project white or amber/yellow light. Red, blue, green, or flashing strobe lights are strictly banned under the Motor Vehicles Act.
- City Usage Regulations: Auxiliary high-output pods are legally treated as "off-road / highway pass lights." They must remain covered with opaque caps or physically switched off within municipal city limits.
                      LEGAL MOUNTING ZONE
   [ Handlebar Level ] ------> X ILLEGAL (Above Headlight)
         ( O )  <------------ OEM Headlight Level
   [ Crash Guard ] ----------> ACCEPTABLE MOUNTING ZONE (Below Headlight Line)
         |   |
        (o) (o) <------------ Aux Pods (Must point downwards 2-5 degrees)
Traffic Challan & Legal Fine Breakdown
| Violation Section | Offence Description | Fine Amount (1st Offence) | Fine Amount (2nd+ Offence) |
|---|---|---|---|
| DMVR 97(2) / 177 MVA | Unauthorized colored lights or top-mounted light bars | ₹500 | ₹1,500 |
| Section 112(4)(C) / 177 MVA | High-beam glare misuse blinding oncoming traffic | ₹500 | ₹1,500 |
| Section 190(2) MVA | Illegal electrical modification causing safety hazards | ₹1,000 | ₹2,000 + RTO inspection order |
Pro Tip from my personal highway rides: When riding through major city check-posts or state borders, keep your auxiliary lights covered with neoprene sleeves and controlled via an independent switch. If pulled over, demonstrate that the auxiliary system operates on its own dedicated circuit and is physically disabled for city commuting.
Technical Specs That Matter: Lumens, Lux, Wattage, and IP Ratings
When comparing technical spec sheets for the best aux lights for royal enfield himalayan and ktm duke, avoid falling for exaggerated marketing claims. Here is how to evaluate real performance numbers:
Lumens vs. Lux: What Actually Matters?
- Lumens: The total amount of light emitted by the LED diode in all directions. A high lumen rating without proper optical lensing simply sprays light uselessly into the sky.
- Lux: The intensity of light measured at a specific point on the road surface (1 Lux = 1 lumen per square metre). Lux determines real-world beam throw. A 3,000-lumen spotlight with targeted optics can deliver higher usable road lux at 150 metres than a poorly focused 8,000-lumen light bar.
Electrical Capacity: Wattage & Stator Margins
Installing oversized 80W–100W light setups on small-displacement bikes will drain the battery and burn out the stator coil. Always check your motorcycle's alternator output capacity before purchasing:
- Royal Enfield Himalayan 450 / 411: Stator handles up to 50W–60W total auxiliary draw comfortably.
- KTM Duke 250 / 390 & Adventure 390: Modern CANBUS systems monitor electrical loads closely. Max recommended aux draw: 40W–50W total pair.
- Bajaj Pulsar / TVS Apache Series: Limited stator headroom. Stick to efficient 20W–30W light pairs.
Waterproofing & Vibrations: IP Ratings
Indian riding subjects gear to intense downpours and constant road chatter. Ensure your auxiliary pods carry at least an IP67 rating (dust-tight, submersible up to 1 metre for 30 mins) or ideally IP68/IP69K ratings (high-pressure wash resistant). CNC-machined aluminum housing acts as a thermal heat sink, extending diode life significantly over cheap plastic housings.
Step-by-Step Installation: Relays, Switches, and Beam Aiming
Never splice auxiliary light wires directly into your bike's stock wiring harness—doing so instantly voids your factory manufacturer warranty and increases the risk of short circuits or fires. Follow this guide on how to wire motorcycle aux lights relay correctly:
+-----------------------------------------------------------------------------------+
|                                 BASIC RELAY WIRING DIAGRAM                        |
|                                                                                   |
|  [ Battery Positive (+) ] -----[ 15A Fuse ]-----> Pin 30 (Relay)                 |
|  [ Battery Negative (-) ] ----------------------> Pin 85 (Relay Coil Ground)      |
|  [ Ignition / Switch +12V ] ----[ Aux Switch ]--> Pin 86 (Relay Trigger Signal)   |
|  [ Pin 87 (Relay Output) ] ---------------------> [ Auxiliary Light Positive (+) ]|
+-----------------------------------------------------------------------------------+
Installation Steps
- Disconnect Battery: Disconnect the negative terminal first, followed by the positive terminal before touching any electrical components.
- Mount the 4-Pin 40A Relay: Position the automotive relay securely under the seat or body panels near the battery, using zip-ties or mounting brackets to keep it dry and isolated from engine heat.
- Run Heavy-Gauge Main Power Lines: Connect heavy-gauge copper wire (14-AWG) from the battery positive terminal through an inline fuse holder (15A fuse) directly to Pin 30 of the relay.
- Wire the Trigger Signal (Switched Power): Tap Pin 86 to a switched 12V ignition source (such as your license plate light wire or rear tail-light line). This ensures your auxiliary lights cannot turn on or drain your battery when the ignition key is switched off.
- Install Handlebar Switch to Relay: Connect your waterproof handlebar toggle switch in-line along the trigger wire powering Pin 86.
- Connect Aux Lights Output: Wire the positive power lead from both auxiliary light pods to Pin 87. Ground the negative leads from both lights directly to the battery negative terminal or chassis frame ground point.
- CANBUS High-Beam Synchronisation Trick: On bikes with CANBUS wiring (like modern KTMs and BMWs), do not tap the high-beam wire directly for triggering. Use a isolated solid-state relay interface or non-intrusive magnetic inductive tap to trigger the auxiliary high beam automatically when you hit the stock pass-flasher switch.
Precision Beam Aiming Calibration
To avoid blinding oncoming drivers while maximizing your road view, perform this calibration on a flat surface facing a dark wall 7.5 metres (25 feet) away:
- Sit on the motorcycle with full riding gear to compress the rear suspension to actual riding height.
- Measure the distance from the ground to the center point of your mounted auxiliary light lens.
- Mark a horizontal chalk line on the wall at that exact height.
- Adjust your auxiliary light pods so that the top beam cut-off line rests 5 to 7 cm BELOW your chalk line at a 7.5-metre distance. This ensures a 2-degree downward tilt, keeping bright light on the road surface while preventing glare into oncoming vehicle windshields.
📋 Complete Manali to Leh Himalayan Highway Planning Kit on MileMarked This route has a verified day-by-day itinerary, mapped fuel stops, hotel suggestions for every night, break points, and a downloadable packing checklist. Visit the Manali to Leh Himalayan Highway trip page on MileMarked to download the complete planning kit — it's everything you need before you leave home.
My Take: Stop Buying 80W Hyper-Bright Lights for City Commuting
Here is my honest opinion after testing dozens of setups across India: the current trend of fitting 80W to 100W blinding light setups on small-displacement street bikes is pure foolishness.
I see riders in cities like Bengaluru and Pune blasting 7,000-lux blinding white spotlights while commuting through well-lit urban streets. Not only does this endanger oncoming commuters, but it also prompts local traffic authorities to enforce strict bans and impose heavier fines on all touring riders.
For 90% of Indian touring scenarios, a quality 30W to 40W dual-color set (yellow low / white high) with clean optical cut-offs delivers all the illumination you need without overloading your alternator or blinding others. Save the maximum beam output for empty, dark national highways and unlit rural stretches.
About the Author
Parth Kapoor is the founder of MileMarked and has been riding motorcycles across India since 2019. He has personally verified routes from Ladakh to Tamil Nadu, logging over 40,000 km on Indian highways and mountain passes. Parth built MileMarked after getting lost on the Spiti circuit with an outdated itinerary — his mission is to make sure no rider makes the same mistake.
Ready to ride your next long-distance highway route? Don't leave home without the complete MileMarked planning kit — verified fuel stops, hotel recommendations, break points, and a packing checklist built specifically for Indian highway touring. Riders who plan with MileMarked data ride smarter and worry less. Visit the MileMarked Trips Hub to download your route kit now.
Frequently Asked Questions
Are auxiliary lights legal on motorcycles in India?
Yes, auxiliary lights are legal provided you follow Central Motor Vehicles Rules (CMVR). The setup must not exceed four forward lights in total, lights must be mounted below the primary OEM headlight level, beams must be white or yellow/amber, and they must remain switched off or covered with opaque caps inside municipal city limits.
How to choose between spot beam and flood beam for night riding?
Choose spot beams (10°–20° narrow angle) if you frequently tour on high-speed unlit national highways where long-distance visibility (150+ metres) is essential. Choose flood beams (60°–90° wide angle) for low-speed mountain touring, foggy passes, or monsoon riding where wide shoulder illumination is needed to track road edges.
How much wattage can my motorcycle battery handle for extra lights?
Most entry-to-midweight touring motorcycles (200cc to 400cc) can support 30W to 50W of total auxiliary power draw without draining the battery. Always check your stator coil output; installing lights that exceed your alternator's surplus generating capacity will result in dead batteries during long night rides.
Can auxiliary lights drain my bike's battery while riding?
If your auxiliary light wattage exceeds your alternator's charging output at low engine RPMs, your bike will draw power directly from the battery, eventually draining it. Wiring your setup through an ignition-switched relay ensures lights turn off automatically when the engine key is off, preventing stationary battery drain.
Do I need ARAI-approved auxiliary lights to avoid police fines?
While individual aftermarket lights rarely carry specific ARAI certification stamps, keeping your setup compliant with CMVR regulations—mounting below headlight height, using dedicated switches, maintaining cut-off calibration, and using covers inside city limits—is the best way to prevent traffic police fines.